Install on the whole disk
Install Atlas by erasing a whole disk, step by step with Atlas Setup.
Everything on the chosen disk will be erased
This method erases the whole disk, Windows and all your files included. Back up what you want to keep first, and do this on a spare computer or in a virtual machine. To keep Windows, see Next to Windows.
Start from the stick (Try Atlas) and, at the question What would you like to do?, choose Install Atlas. Every page has a Back button: nothing is written to a disk before the final confirmation.
Choose the disk
Where do you want to install Atlas? Atlas Setup lists the disks the way a person knows them: the model, the size, and what is on it in words ("Windows is on it now", "Linux", "It is empty", "Other files are on it").
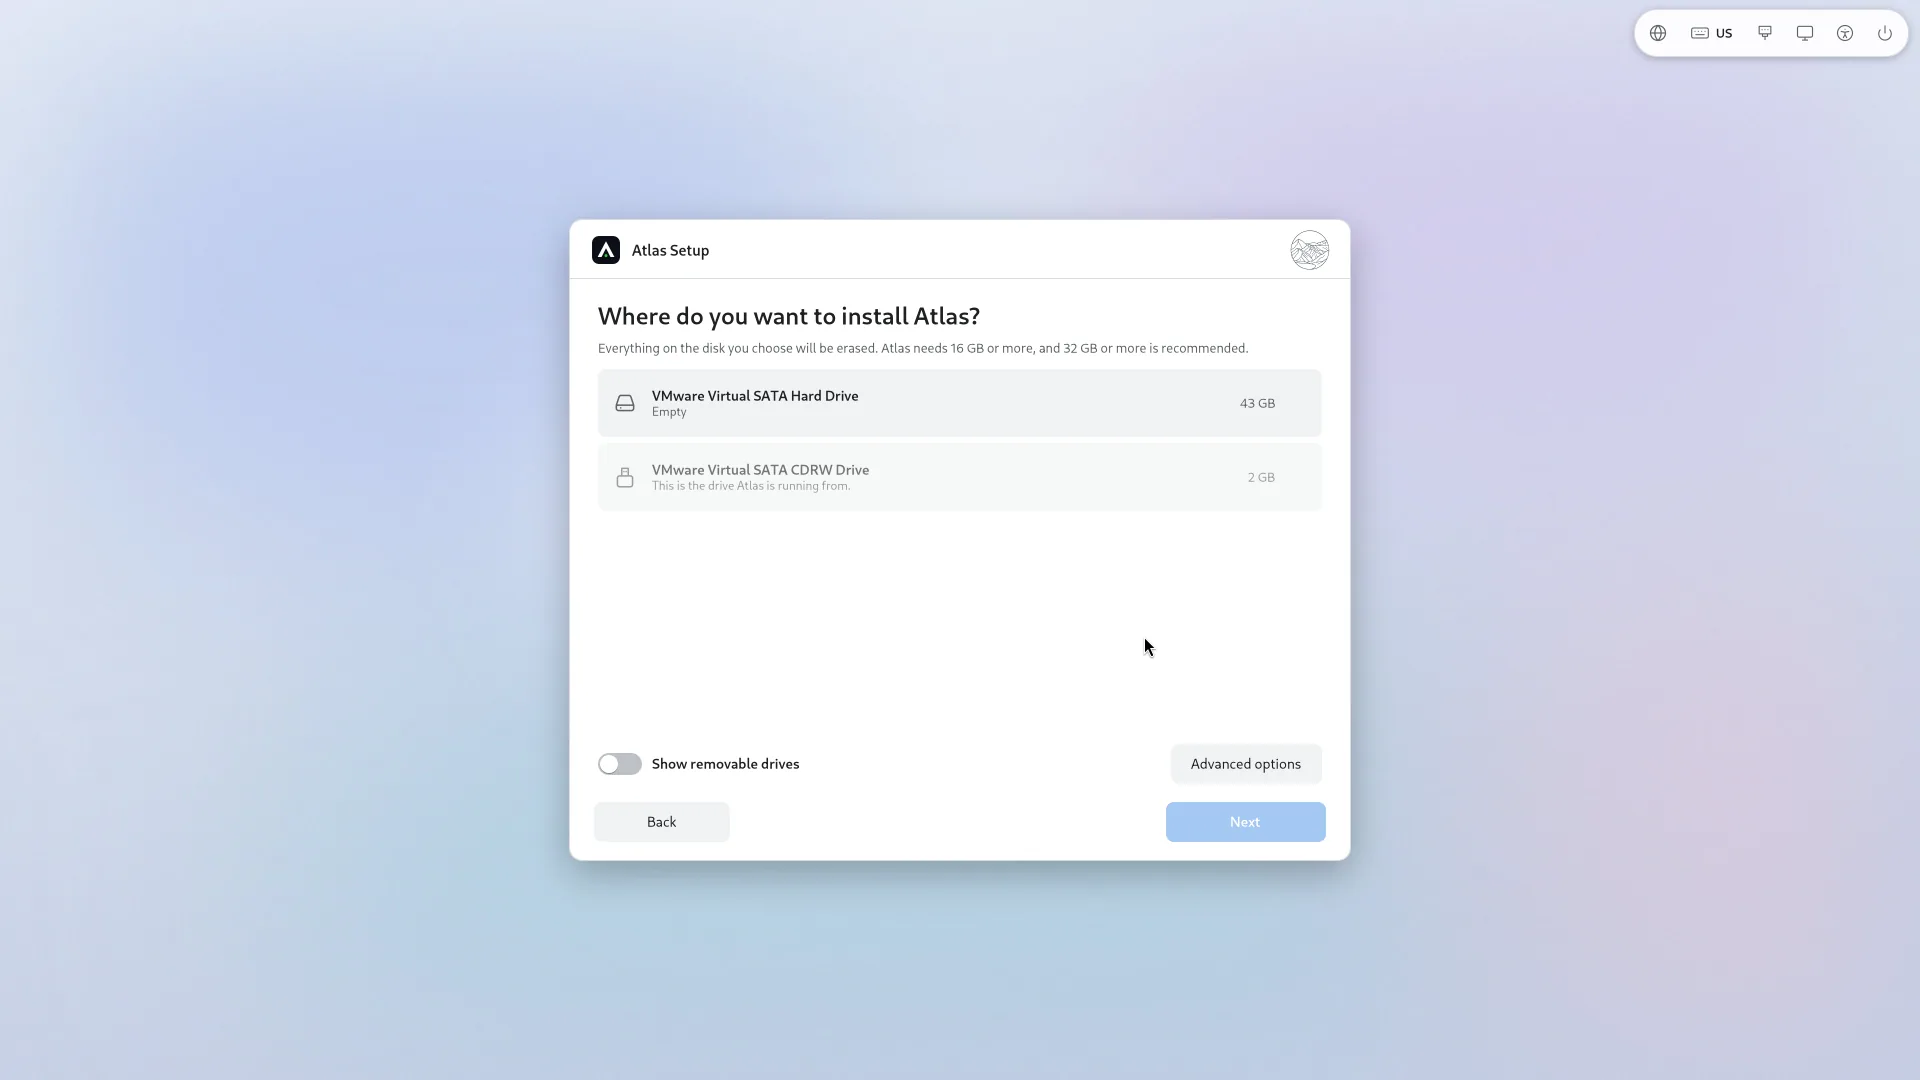
Not offered, or greyed with the reason: the stick Atlas runs from, disks that are too small (Atlas needs 16 GB, and 32 GB is recommended), and disks in use. USB sticks and SD cards are hidden: Show removable drives shows them, with a warning (Atlas would only start when that drive is plugged in, and a USB drive is slower).
Select the disk, then Next.
Choose how to install
How do you want to install Atlas? Choose Erase the disk and install Atlas. The other choices, Install Atlas alongside Windows and Choose partitions, are explained in Next to Windows and Free space.
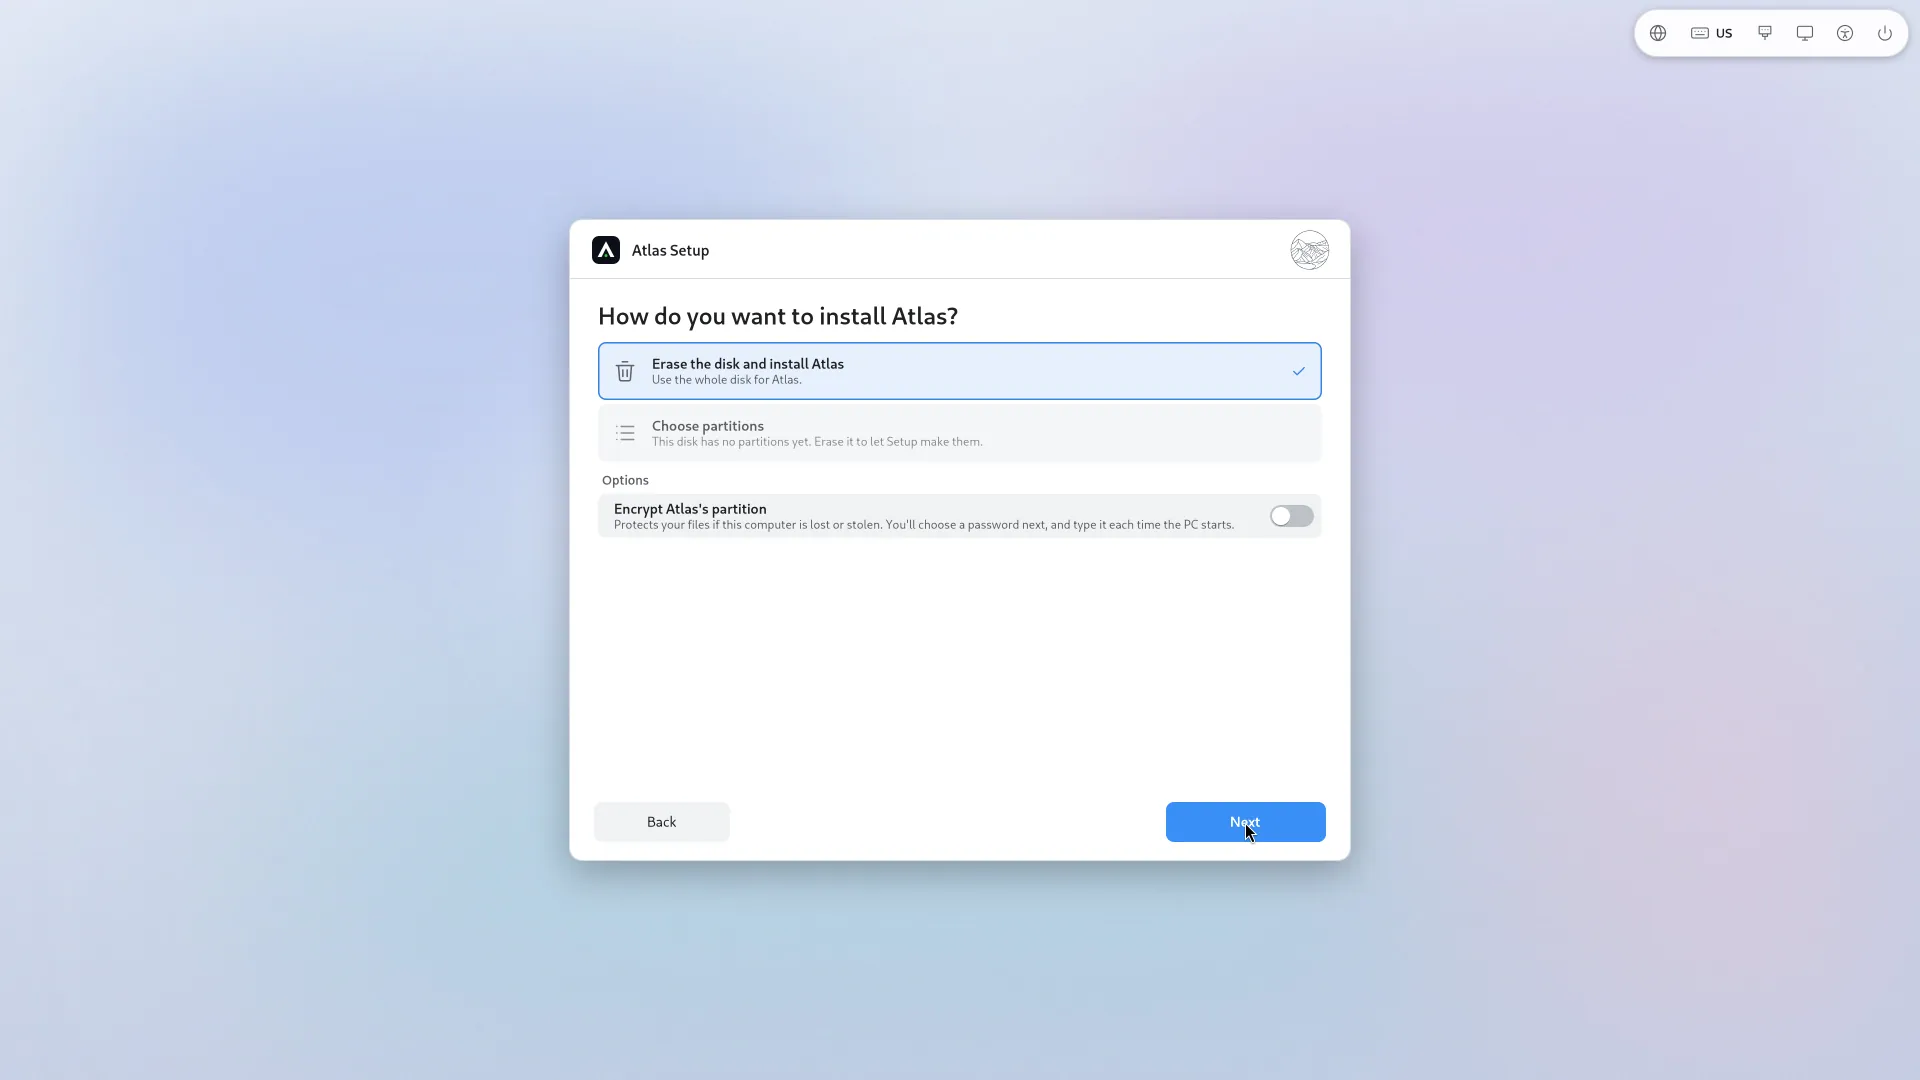
You can also tick Encrypt Atlas's partition: read Encryption before you do.
Create your account
Who's going to use this PC? Your name, a user name (suggested from your name), a password typed twice, and the PC's name.
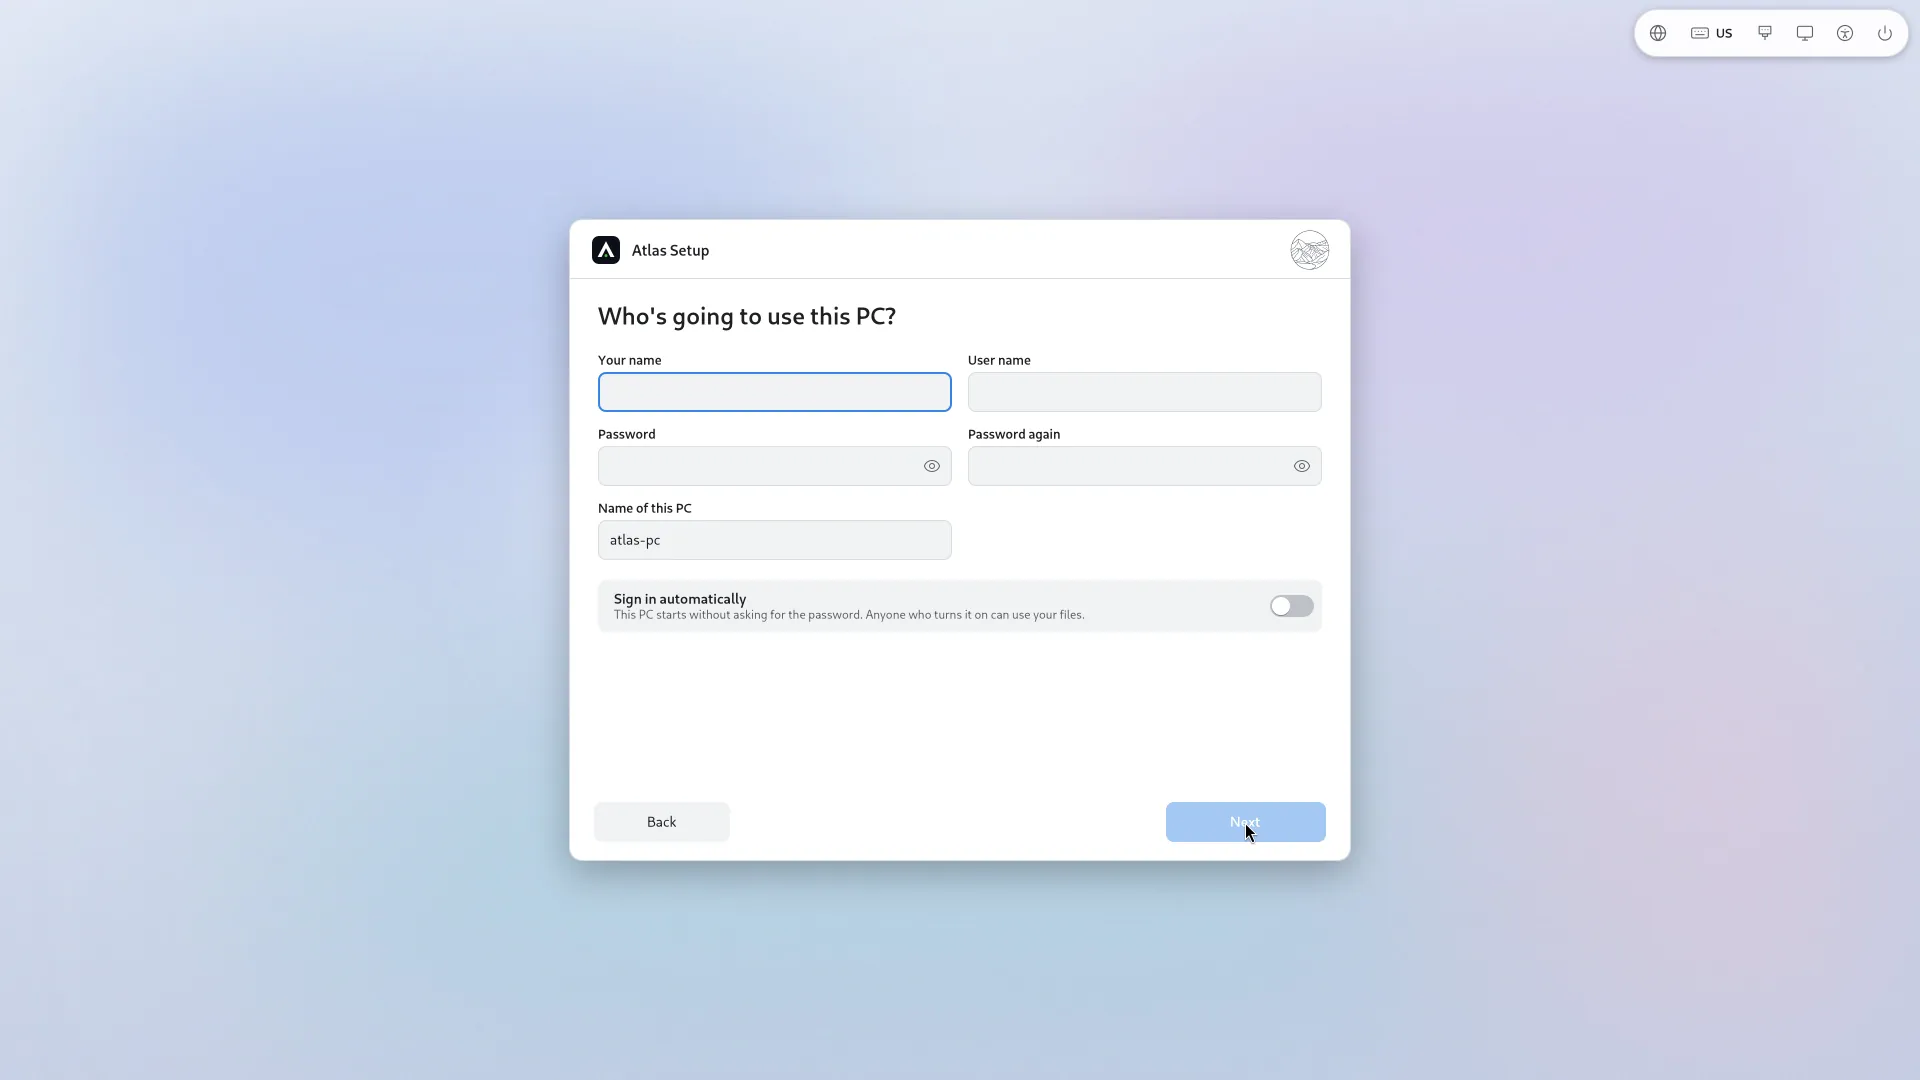
The password must have at least 8 characters, not be your user name or a very common password, and avoid 4 repeated or sequential characters (like aaaa or 1234).
Sign in automatically is off by default. When it is on, the PC starts without asking for the password: anyone who turns it on can use your files.
This account is an administrator. Atlas makes no "root" account: the administrator has the rights that are needed.
Choose your apps
Choose your apps. Switch off the ones you don't want: they are left out of your installation. Each app has its icon and a line saying what it does. The groups: Internet (Firefox), Documents, Photos and media, Software and Flathub, Tools. Explorer, Settings, Start, the keyboard and the sign-in screen are always installed. Setup only offers to leave out what can go without taking other parts of Atlas with it.
Further down, this PC's settings: automatic updates, Flathub (a large store of apps, in Software) and an optional swap file. Memory is already compressed (zram) on every PC; the swap file gives more room on the disk when memory is full.
Check, then confirm
Ready to install sums it all up: the disk that will be erased (and what is on it now), the language, the keyboards, the time zone, the account, encryption, the apps left out. Press Install, then confirm the question Erase this disk and install Atlas? with Erase and install.
Once the installation starts, it can't be cancelled. Do not turn off the computer or take out the USB stick.
Wait
Installing shows the steps in words (preparing the disk, copying Atlas, setting up the system, creating your account, making the disk start Atlas...) with a progress bar, and a slideshow of what Atlas has. In our virtual machines it took two to four minutes; a real PC, or a slow disk, may take longer.
Restart
Atlas is installed. Take out the USB stick, then restart to start your new Atlas. Next: the first start.
If the installation fails
Atlas Setup says which step it stopped at, and whether the disk was changed. It offers Try again, Save the log and Restart. Save the log writes atlas-install-log.txt in the trial session's home folder, which disappears at restart: copy that file to another stick, or attach it to your report, before you restart. When you try again, passwords have to be typed again; that is on purpose.
What Setup did to the disk
On a UEFI PC: a GPT table, a 512 MiB EFI partition and one large ext4 partition for the rest. On a BIOS PC: an msdos table and an ext4 partition (GPT with a small BIOS boot partition above 2 TiB). The UEFI firmware gets an Atlas entry and, by default, a fallback entry Atlas (backup).